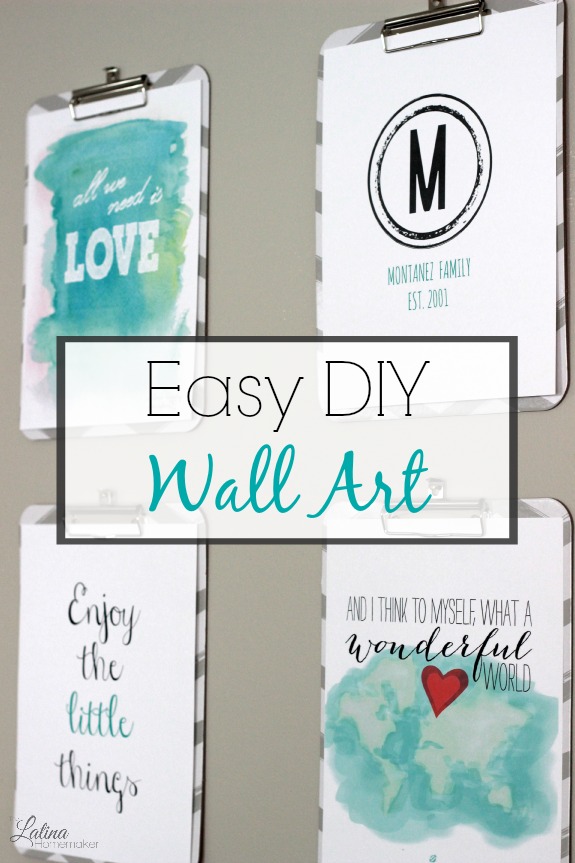
Easy and Inexpensive DIY Wall Art
We’ve been living in our current home for 16 months and I have to yet to finish decorating. I blame it on the fact that we moved when I was approximately 2 months shy of my due date. I was very pregnant and simply content with the fact that we fully unpacked. Decorating was definitely not a priority. I’m also a bit picky since I like to keep things simple around here, so I wind up thinking twice about the things I buy or bring into the home. Well after visiting my sister-in-law recently and seeing that she has fully decorated her home although she just recently moved, I knew I could no longer use the “I just moved” excuse. The time has come to finally start tackling my long home projects lists. So today I’m sharing an easy and inexpensive DIY wall art project that can be put together in one day.
Materials
4 clipboards-I found mine in the dollar section of Target (holla!).
4 FREE prints
Whatever you decide to hang these up with. I simply used nails.
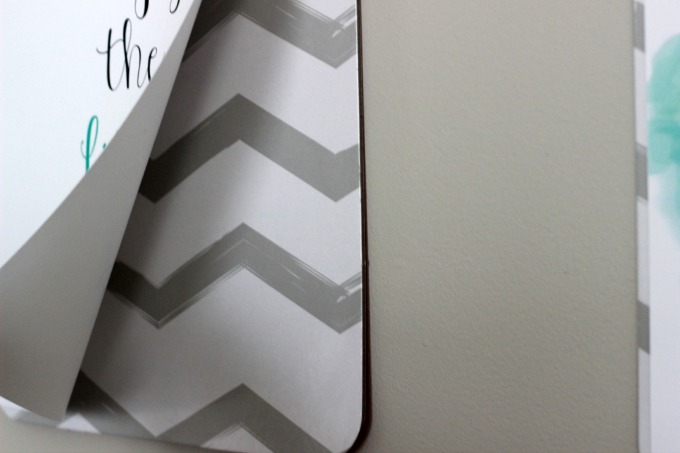
As far as the clipboards go, I truly got lucky. I was looking for regular clipboards that I planned to paint white with some leftover paint I have at home. However, thanks to Target’s dollar section I find these four clipboards that were white and grey chevron. So I basically skipped a step. If you can’t find ones in the color you want, simply paint them whatever color your heart desires.
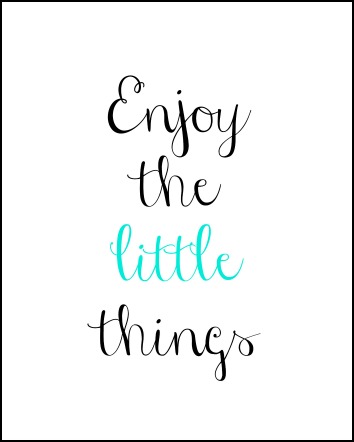
Next, find FREE prints online. I suggest you go to Pinterest and search there. Just a quick warning; you’ll see a lot of Etsy printables in your search, but I personally wouldn’t pay for a print since there are tons of free ones available. I found two that I really liked and made the other two prints. I’m no artist so you can probably guess which two I made. I simply used PicMonkey to create them.
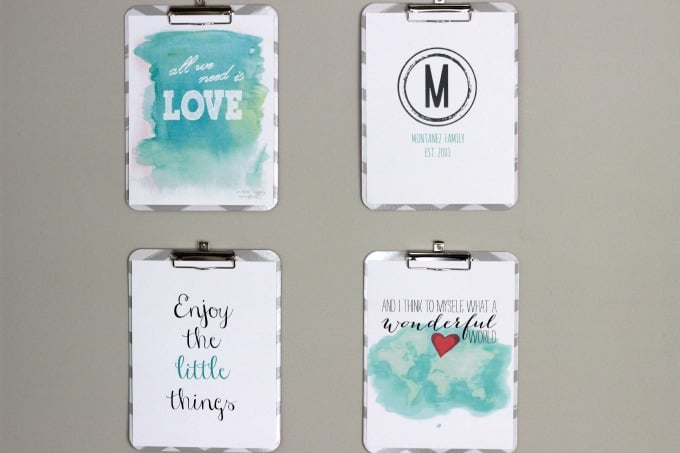
The two prints I found through Pinterest are: the bottom right hand side print from LostBumbleBee and top left side from We Lived Family Ever After. They are absolutely gorgeous and I love how they all mesh together well. You can print these at home if you have a good printer and cardstock paper. I had all four printed at a local UPS store for a couple of dollars. I chose the cardstock paper since I didn’t want the glossy look of photo paper. If you want the “Enjoy The Little Things” print that I made, simply click on the image below to download.
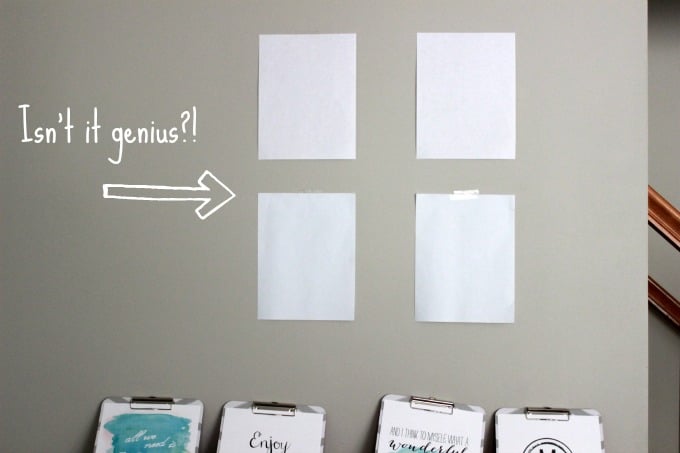
I also wanted to share how I managed to get the clipboards to look somewhat straight. I simply used printer paper and taped it to the wall. I find that this method helps me visually see if it’s where I want it to be before making a hole in the wall. Once I hammer the nail in, I can just rip the paper down. Easy peasy. Although I used clear tape, I suggest you use painter’s tape to avoid damaging your wall paint.
I’m so in love with this wall and can’t wait to continue tackling some more projects. The best part is that it cost less than $6.00!

Do you enjoy decorating with inexpensive finds? Do you have any tips for this gal? I could use some help!
Looking for more DIY inspiration? Check out the following!


The Target One Spot is a fantastic (and yet dangerous!) place! So many cool things can be found there, its just a matter of finding when it goes up – since so much of it gets bought so quickly!
These are fabulous – and so easy to switch instead of frames!
Warm Regards,
Alexandra
http://www.littlewildheart.com
I love this! I’ve been thinking of doing something similar. I love how simple and clean it looks and how easy it is to switch out the pictures. Just curious, was the UPS store cheaper than Staples? Or maybe you didn’t check. I had jus assumed Staples would be the place to go. But now you have me wondering! 🙂
Thanks Lydia! I’m really not sure which one is cheaper. I only chose UPS because there is no Staples or OfficeMax nearby so the cost of gas would probably make up for what I would have saved. 🙂
This is such a great idea, I love that you can easily change out the prints! And what a score on those awesome clipboards!